
Draft2Digital always aims to be user-friendly, particularly for authors who aren't experts with technology. We also know that any new system comes with a learning curve. If you're looking to start a new ebook with Draft2Digital but need some guidance, we have a step-by-step guide to help get you started.
Set Up Your Account
Before you publish your ebook to online bookstores, you should set up your Draft2Digital account. When you sign up for an account, we’ll need a couple of basic pieces of information:
- Author name
- Email address
- Tax verification
At this point you may know whether you want to list books or not. If you want to list books you'll need to pay an activation fee before you are able to distribute any work.
Our interface is easy to use, so getting set up only takes a couple of minutes. Forget trying to learn the quirks of each sales outlet and duplicating your effort across multiple websites. We give you one simple place where you can get it all done and make changes at any time, free of charge.
How to Publish an Ebook
To create and publish a new Ebook project through Draft2Digital:
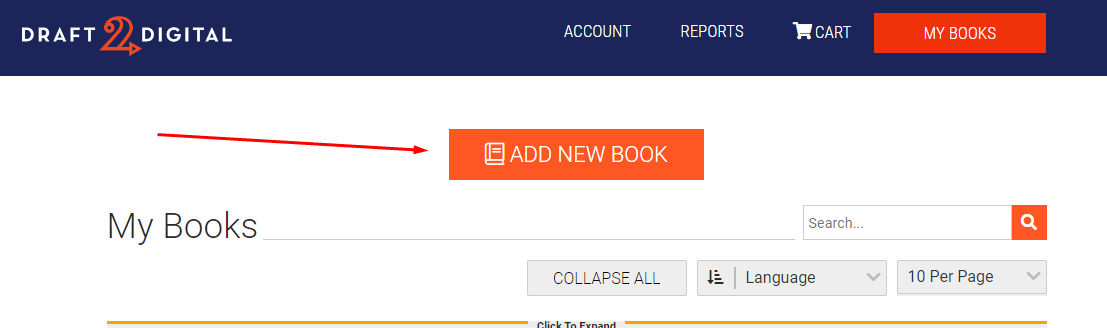
Log in and click on the My Books button on the upper right side of the screen.
Click on Add New Book At the top
Create New Book Project Step
![]()
Click on the big blue “START EBOOK” square to go to the next step: “Create New Ebook”.
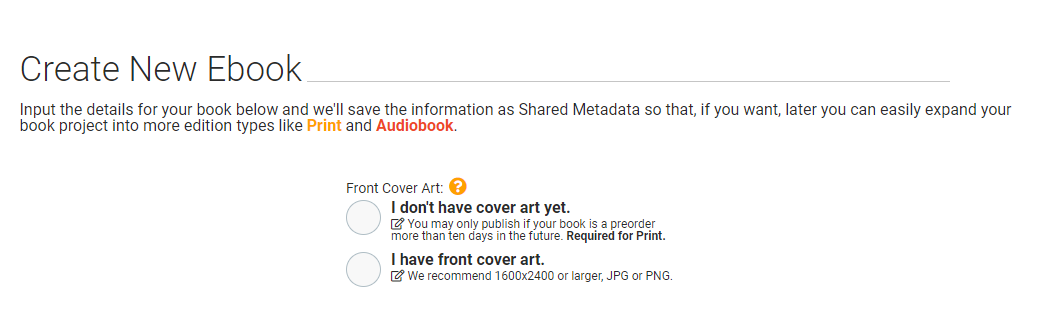
Click a bubble to confirm if you do or do not have a Front Cover Image.
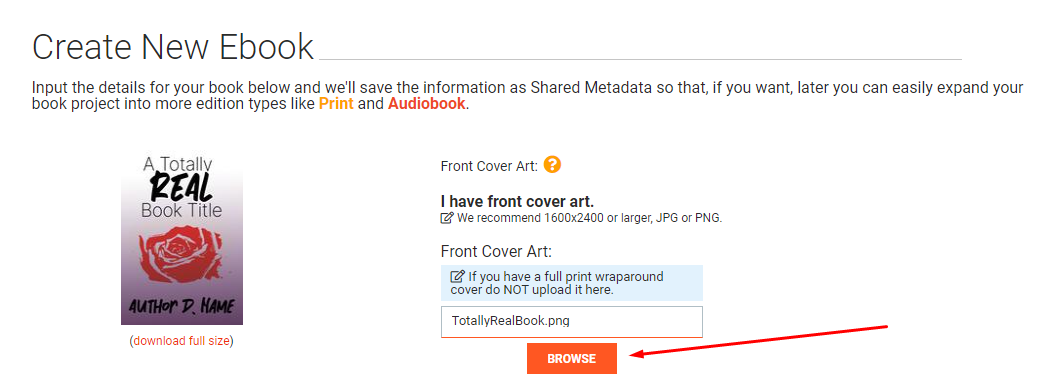
If you have a Cover Image, click Browse
This will pop on your files on the computer. Add your image file
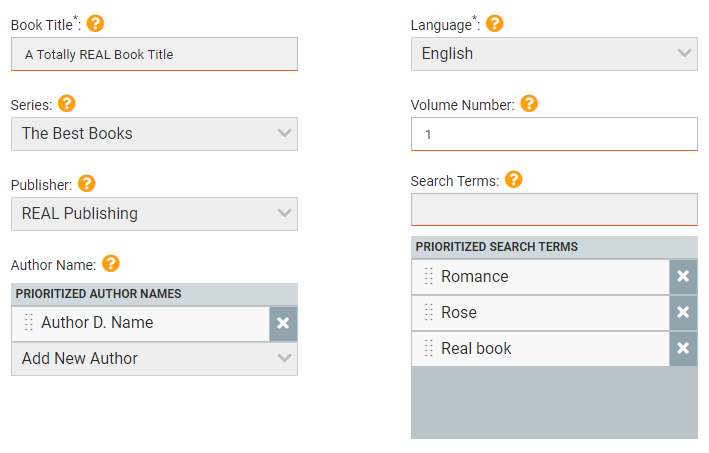
Fill in the Title Field with the Book Title
Make sure to select the accurate Language from the Language Drop-Down list
If the book is part of a series, click on the Series Drop-Down and either select a pre-established Series Name or click Add New Series to make a new series and hit the + button to add it
If the book is part of a series, add a Volume Number in the Volume Number field
Select Author and Publisher Names in the respective Fields
You can add Search Terms in the corresponding field and hit enter to add your Search Term to the list
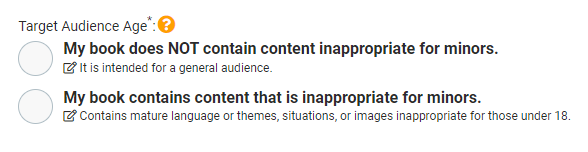
Select a Target Audience Age.
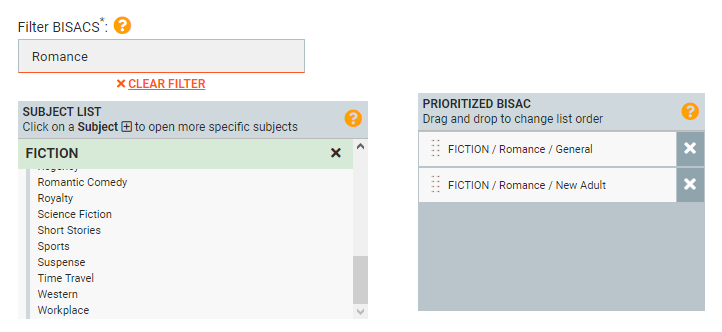
When you choose a BISAC category, make sure you click through all the subgenres until one populates in the box on the right. If you type a word into the filter, you may have to click the + to expand and see the subjects below.
Click “Start Ebook” to continue to Ebook-specific Steps
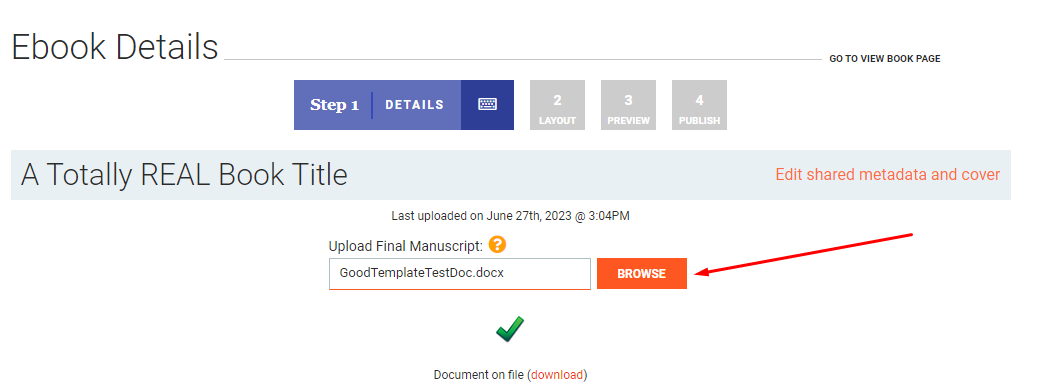
Ebook Details Step
Click on the Browse button under “Upload Book File” and upload the manuscript file.
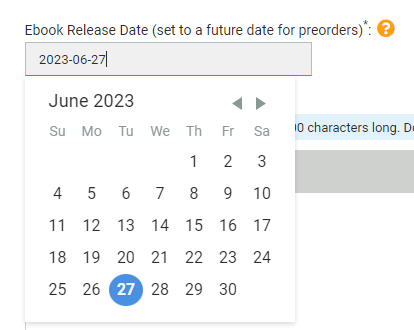
In the “Ebook Release Date” field, click on the field and select a new Release Date from the calendar.
Provide your Book Description in the “Ebook Description” field
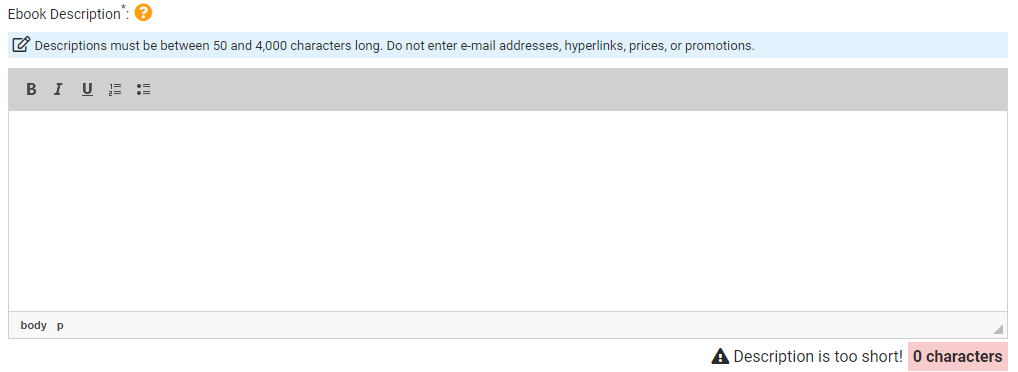
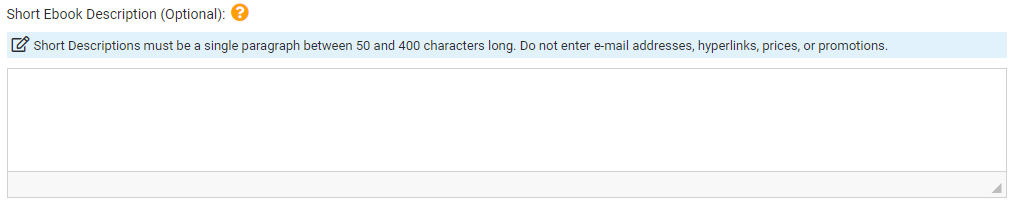
As an optional step, you can also provide a Short description to be used on the Smashwords store.
If your book is a collection of books you’ll need to indicate that by checking the “is this a collection?” box

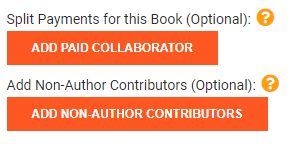
Also on this page, you can assign Split Payments and add non-author contributors.
If you need a D2D-Assigned ISBN, click the bubble next to “Give me a free Draft2Digital ISBN”
If you have an ISBN that you have ownership of, click the bubble next to “I want to use my own Ebook ISBN”
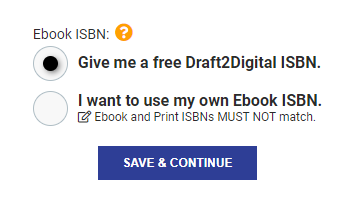
This decision cannot be changed when an ISBN is set for the Book Project.
Click on Save and Continue at the bottom of the Ebook Details Page
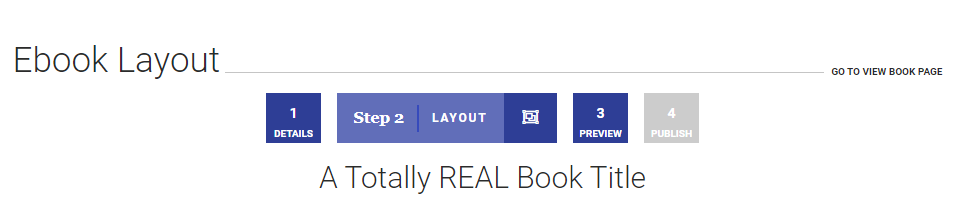
Ebook Layout Step
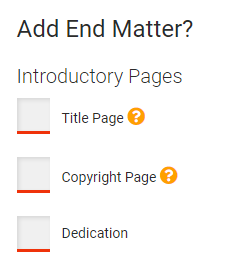
Select the Introductory pages you want added to your file (keep in mind if you have these in your file already you don't need to check the box as it will duplicate)
Add Promotional pages if you like. See our FAQ about our promotional pages.

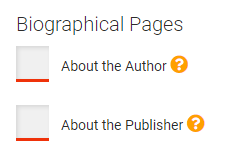
Add Biographical pages if desired.
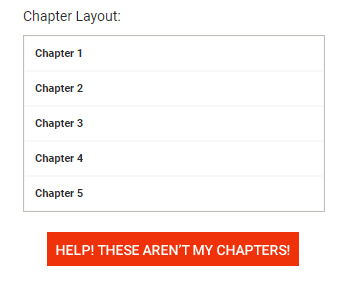
Make sure your contents list looks correct on the right. If not, you may submit a review to the team by clicking Help! These Aren't My Chapters button under the contents list and submitting a Layout Review.
Save and Continue to see the layout of the book
Ebook Preview Step
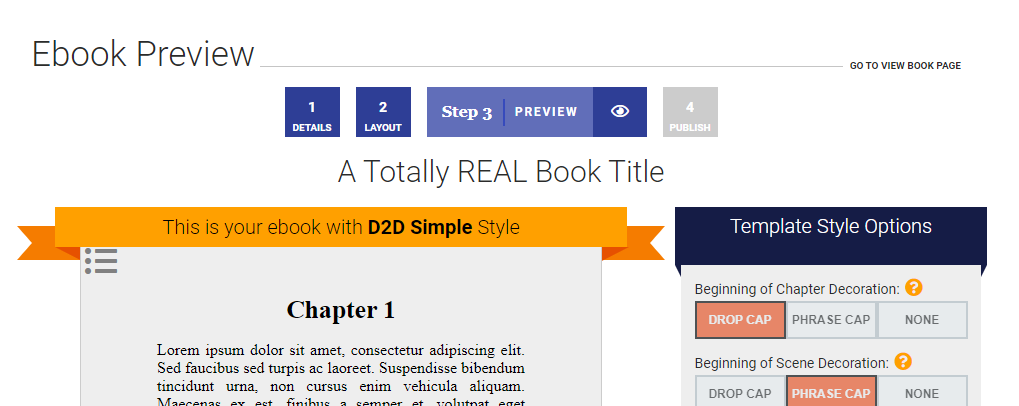
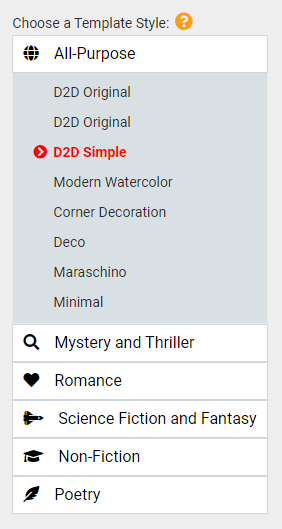
Please click on the options on the right to select a style for your book.
You will see the book file change. Use the top arrows to the sides of the preview to change by page, and use the double arrows to click chapter to chapter.
Click the box to the left of "I have reviewed this manuscript and approve it for release for distribution to any sales channels I select." (Only check this if your file is ready for publishing)
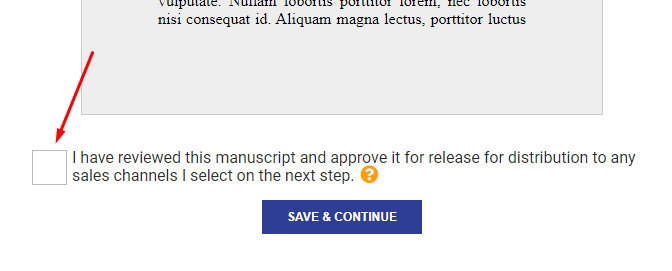
Click on Save and Continue
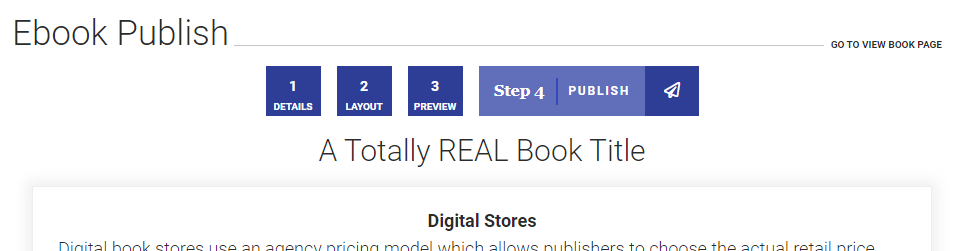
Ebook Publish Page:
Click on the field under “Digital Book Price (USD)” to set your price.
![]()
You can set Territorial pricing for other regions by clicking on Set Territorial Prices when you wish to set up a specific price in other regions. Typically, you will need to override CAD, GBP, AUD, NZD and EUR
To do this, just click on “Manage Territorial Prices”, check the boxes of the prices you wish to override, enter your price in the available field for each one and click “Apply Territories”.
Select your vendors by clicking the checkbox next to the Vendor (You can also use the Toggle Button to select all vendors of that Category)
When you are ready to publish, click on the Submit button
You will see a pop-up for Rights Confirmation. Check one of the top three options then confirm in the bottom box and click “Publish My Book”
You should then see the SUCCESS Page!
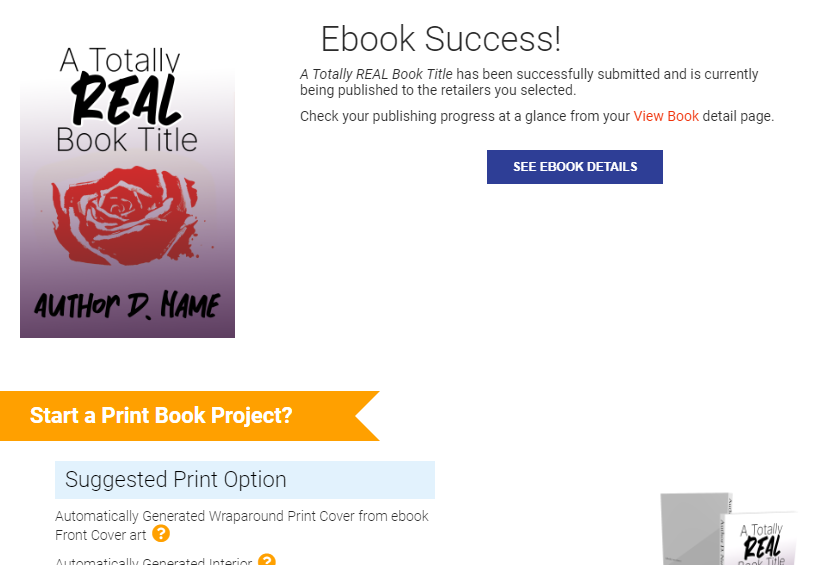
If you've completed all these steps, congratulations! Your book has been submitted for publication and you'll receive an email once your book has been approved.
If you still have questions about the publishing process or run into any new concerns, you should reach out to our support team at support@draft2digital.com and they would be happy to help you!
Happy Writing!